DIY custom insoles don't have to be complicated. With a parametric insole design platform like Ergono3D, you can generate a print-ready STL in minutes — no specialist training, no expensive equipment.
The biggest misconception about "custom insoles" is that they must be hard to make — hand-carved by a specialist, formed from plaster casts, pressed in a clinic, and sent to a lab. To be fair, that's still the reality of the traditional process in many places.
A typical pair of traditional custom insoles goes through:
- Visit a clinic for a foot assessment
- Capture foot shape using plaster, foam box, or a professional scanner
- Send data to a lab
- Technician creates the mold by CNC or by hand, adds top cover and finishing
- Wait several days — or one to two weeks — to receive the final product
This process isn't just slow. It relies heavily on individual technician experience — two different technicians can produce insoles that feel different, and consistency is hard to guarantee. Equipment is expensive, labour is expensive, the workflow is complex.
Today, things are genuinely different. With a home 3D printer, that long traditional chain compresses into three steps:
With Ergono3D, your personal insoles can improve over time — just like software updates — until they feel truly right.
Four real wearers — and what they tweak.
Custom 3D printed insoles aren't a single product — they shape themselves to the foot underneath. Here's what the first few iterations look like for four common wearer profiles.
The 10K runner with high-arched feet
Often surfaces as plantar fasciitis-style heel pain after long runs. High arches transfer ground impact to the heel and forefoot instead of distributing it across the midfoot.
DIY tweak → TPU 95A · raise arch height · deepen heel cup. The first print works for most users; 2–3 iterations for a perfect fit.
Activity-specific design →The nurse on a 12-hour shift
Long-shift workers feel arch fatigue and forefoot burn first. Standing insoles need cushioning and even pressure distribution, not athletic-style rigidity.
DIY tweak → TPU 85A · met pad: Yes · moderate arch height. Iterate forefoot padding until end-of-shift heat goes away.
Why custom insoles work →The court-sports player who rolls inward
Lateral wear on the shoe sole; ankles roll inward on landings. Without lateral support, this load travels up the chain to knees and hips.
DIY tweak → TPU 95A · add medial heel skive · add rearfoot varus post · raise lateral flange.
Court sports insole design →The office worker with flat feet
Wants all-day comfort, not athletic performance. Flat arches often pair with lower-back tightness and inner-ankle fatigue by mid-afternoon.
DIY tweak → TPU 90A (balanced) · raise arch height · raise medial flange · longer arch length ratio.
Parameter glossary →What you'll need. (~30 seconds to check)
- A home FDM 3D printer capable of printing TPU
- TPU filament — 95A (recommended for most use cases)
- Slicer software — Bambu Studio / OrcaSlicer / Cura (any one)
- An Ergono3D-generated STL file
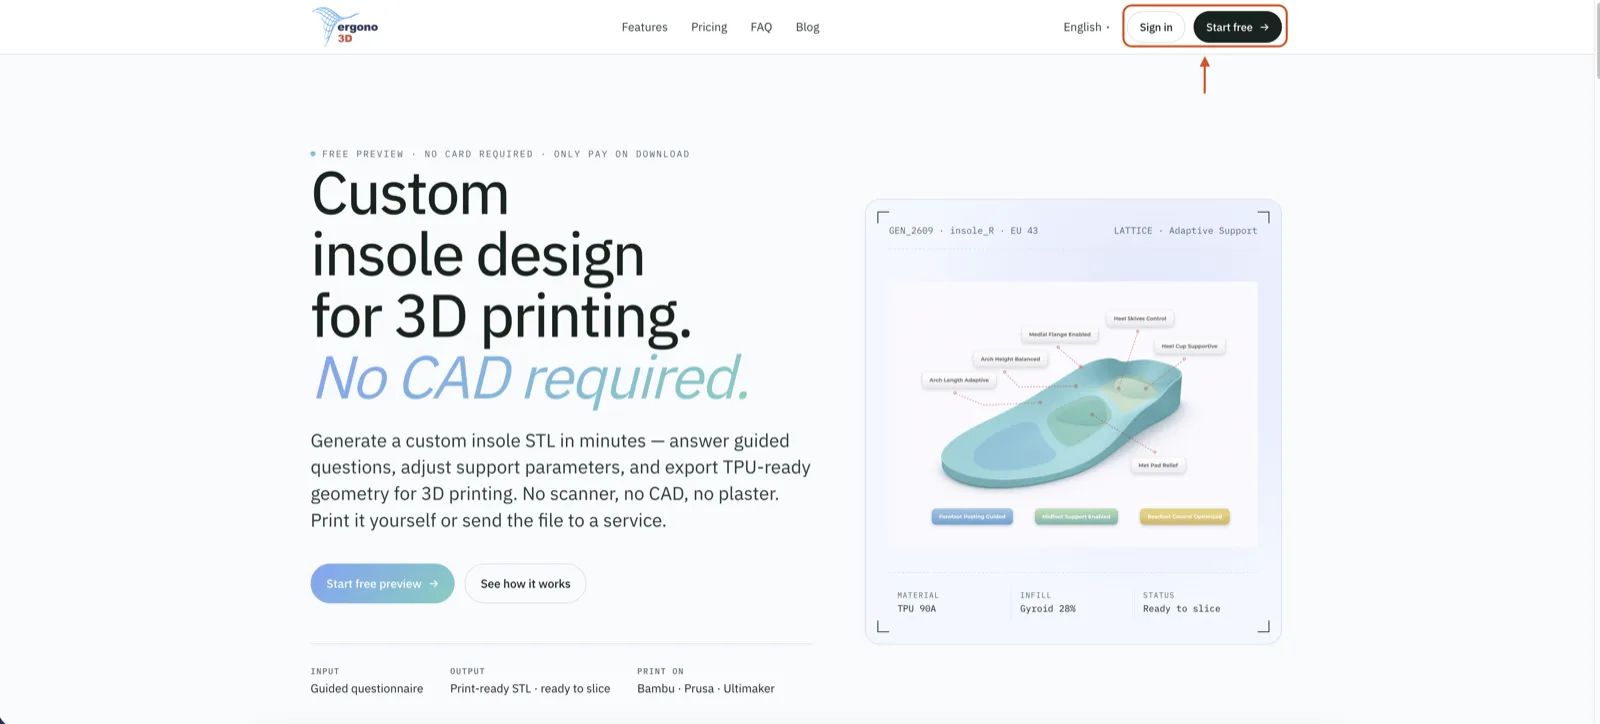
Generate the STL in Ergono3D.
Open ergono3d.com and click Sign up in the top-right corner.
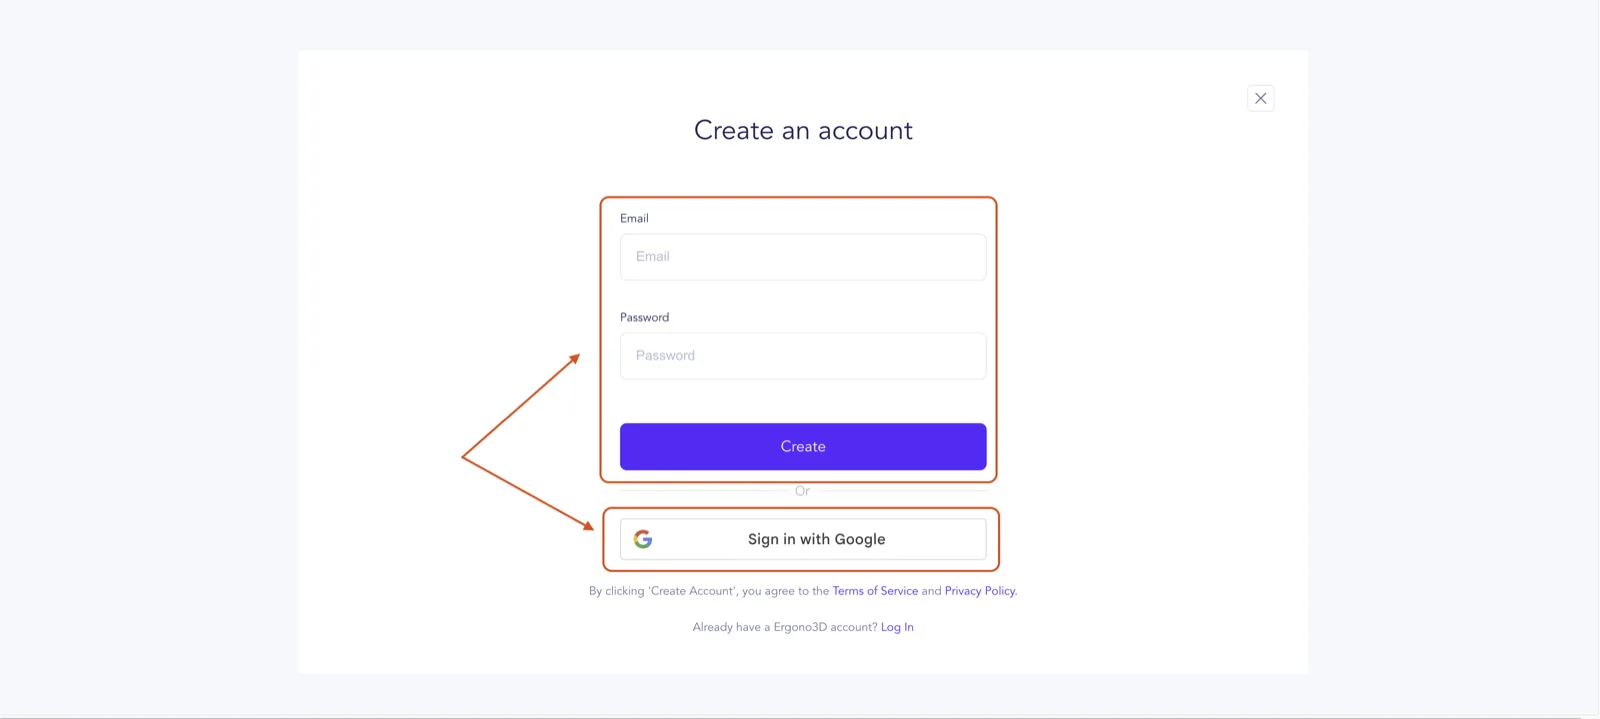
You can register directly with email and password, or continue with your Google account.
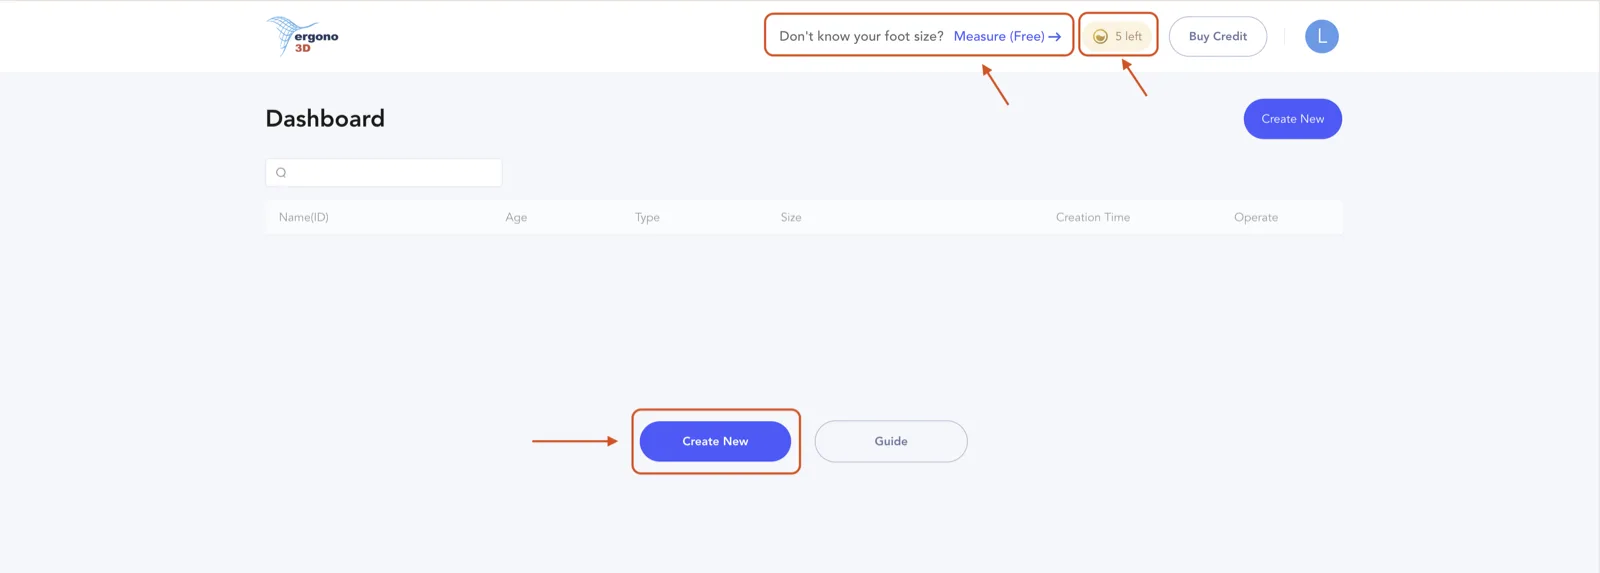
Every new account gets 5 free Preview credits. Click Create New to start a design. If you're not sure of your shoe size, use the free foot measure tool linked from the dashboard — open ergono3d.com/measure, pick A4 or US Letter, step onto the sheet, and trace your foot outline from toe to heel with a dark pen.
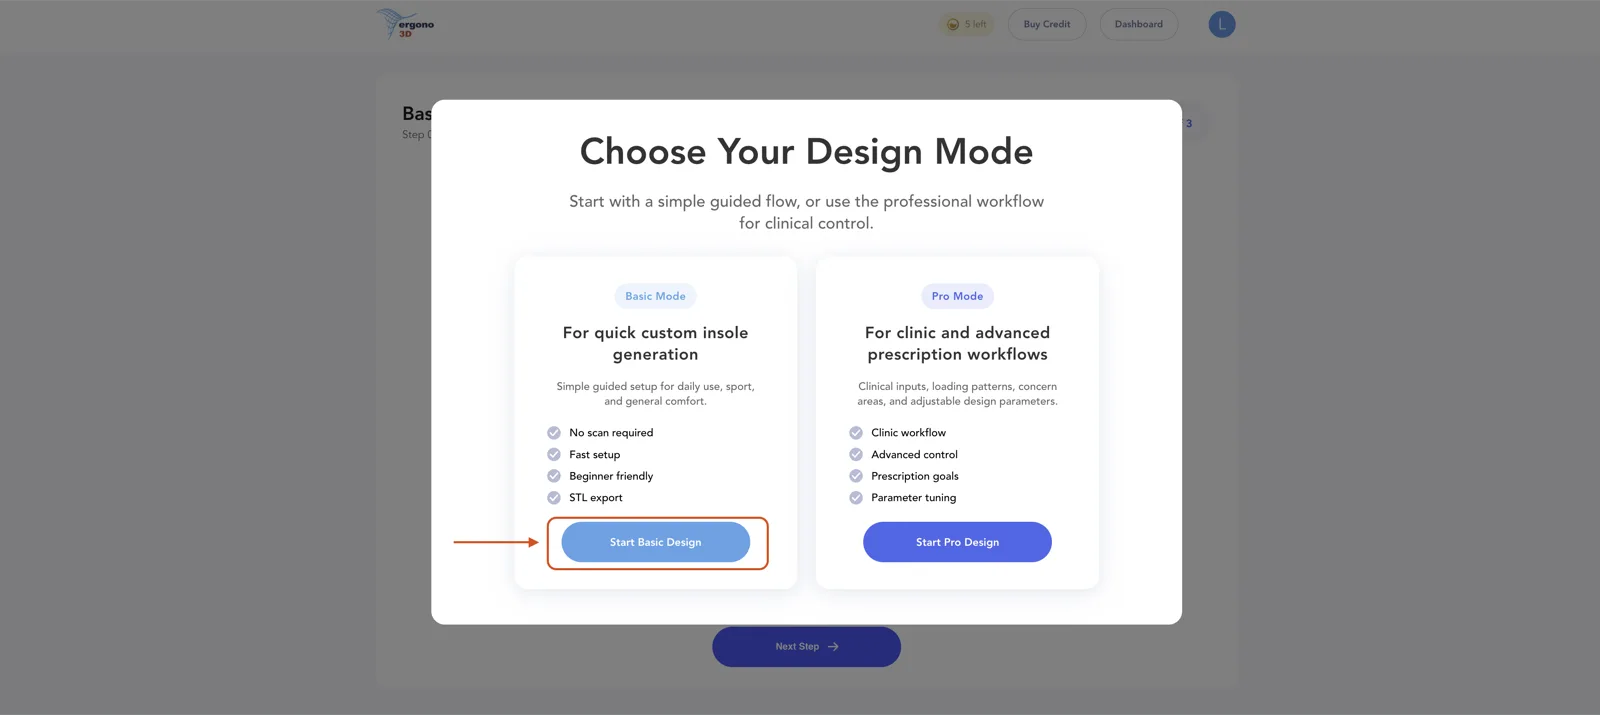
Pick a design mode. For your first pair, choose Basic design — it walks you through a guided survey and produces a print-ready STL.
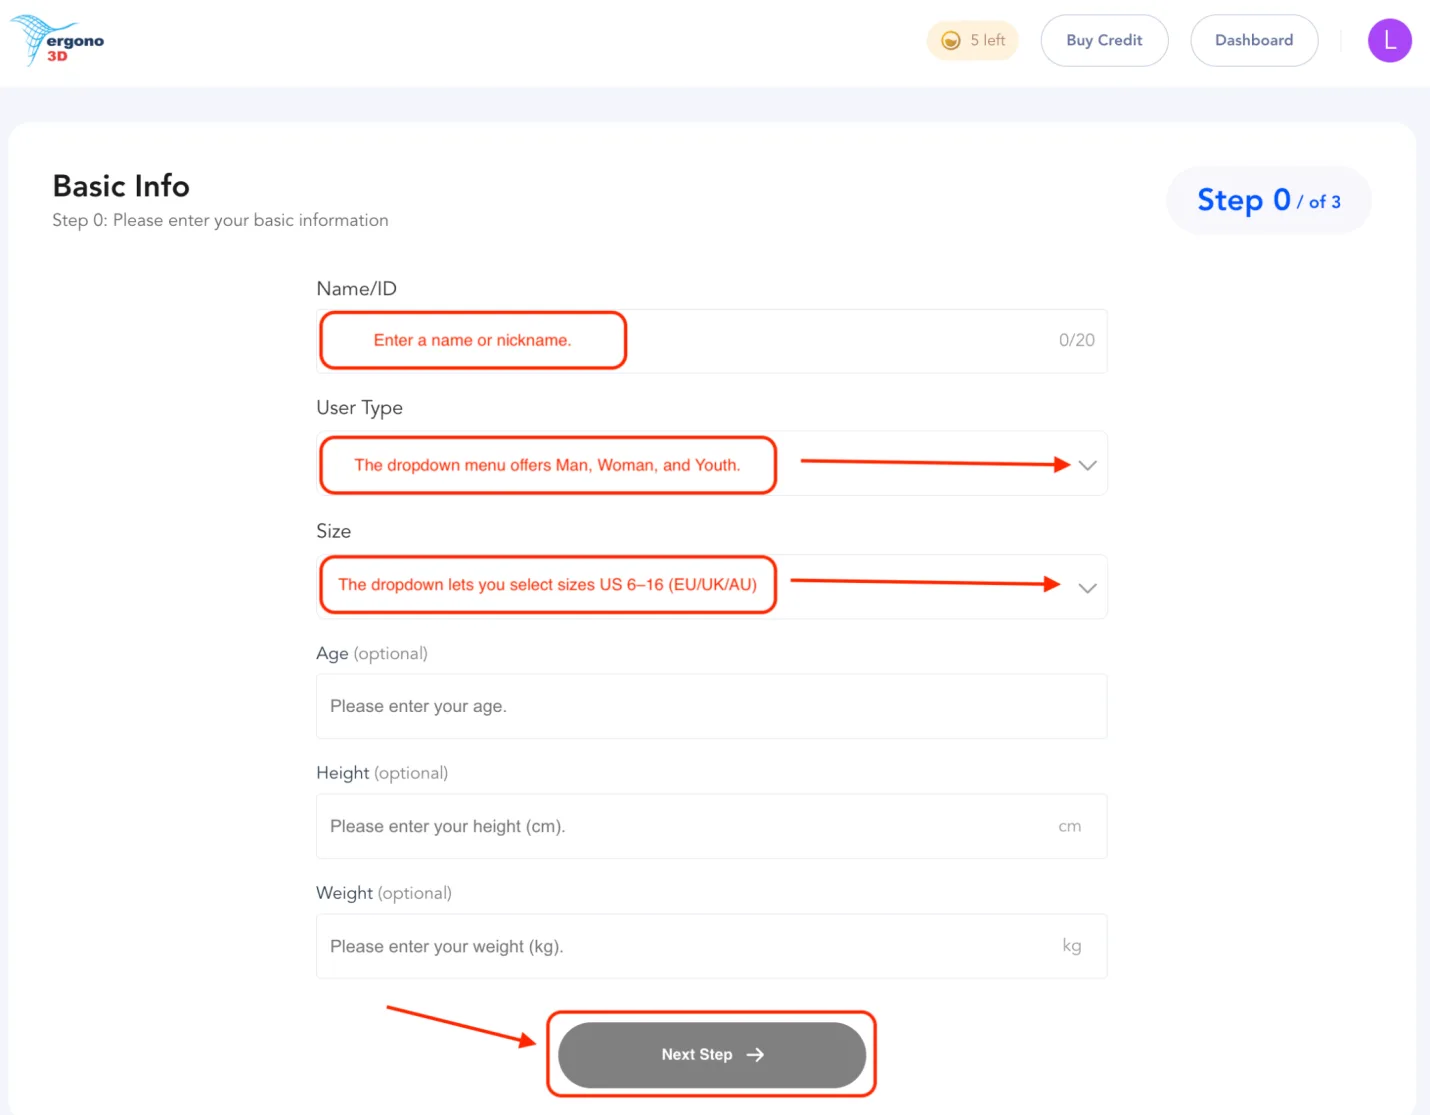
Enter a Name or ID for this pair — a nickname or a number both work. Choose User Type (Men / Women / Youth) and Size (EU / UK / AU — covering US 6–16). Age, height, and weight are optional but help refine the fit. Click Next.
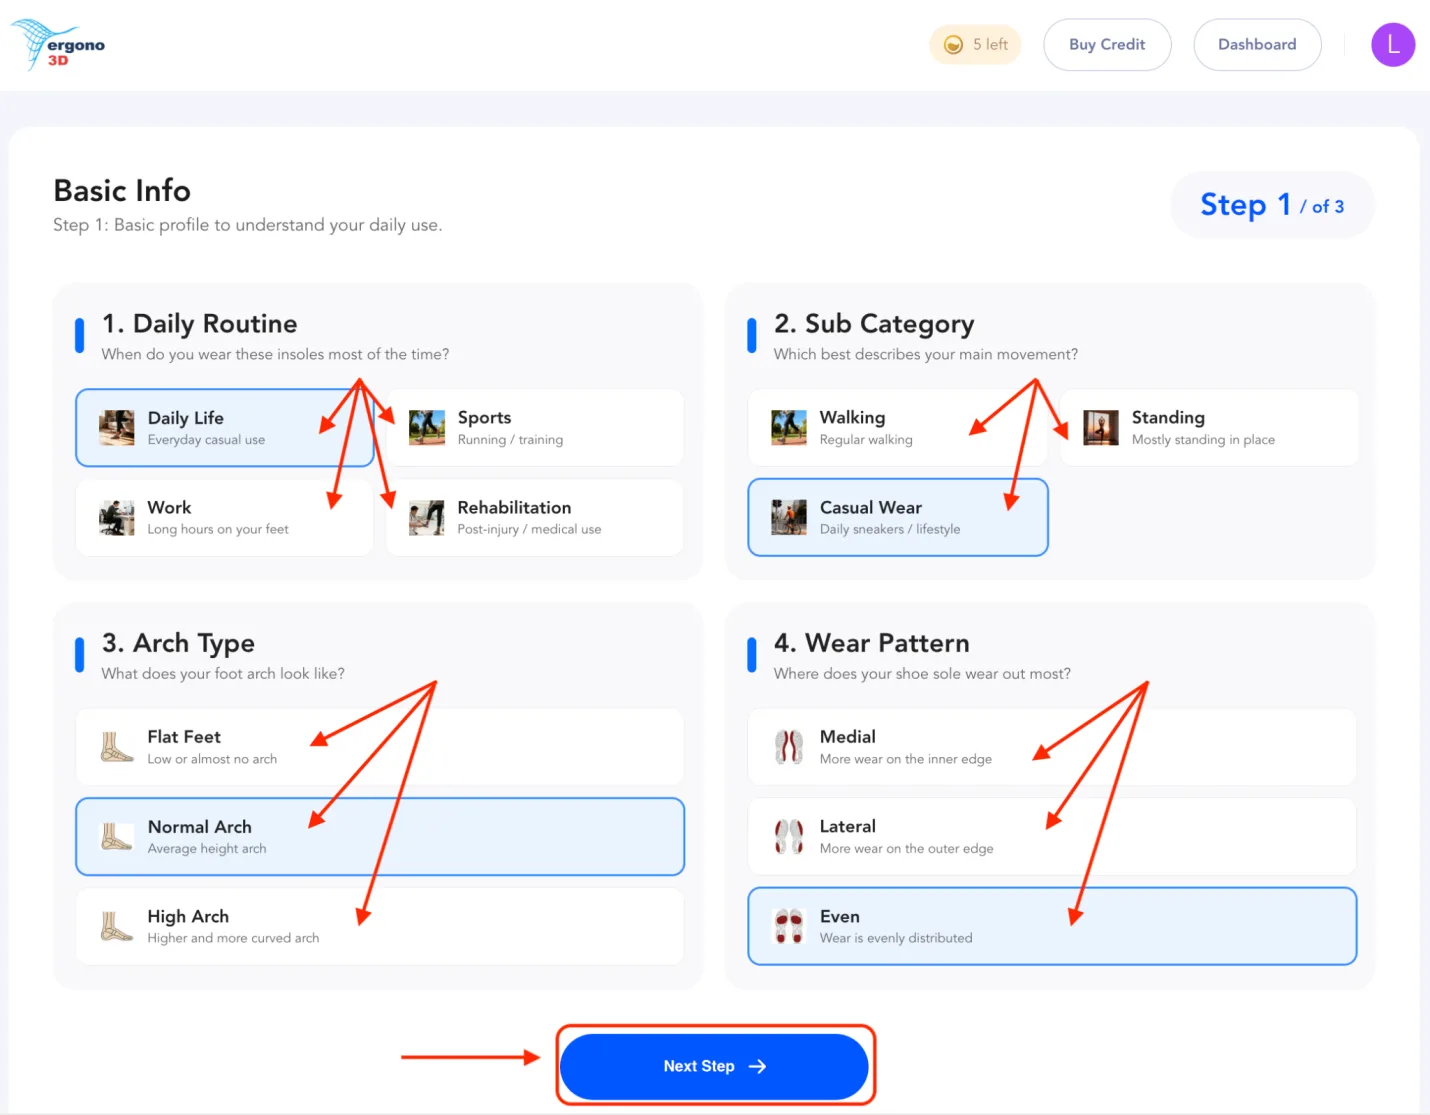
Pick your daily routine (daily life / sports / work / rehabilitation) and a sub-category (walking / standing / casual wear). Select your arch type (flat feet / normal arch / high arch) and the wear pattern on your existing shoe soles — medial, lateral, or even. Click Next.
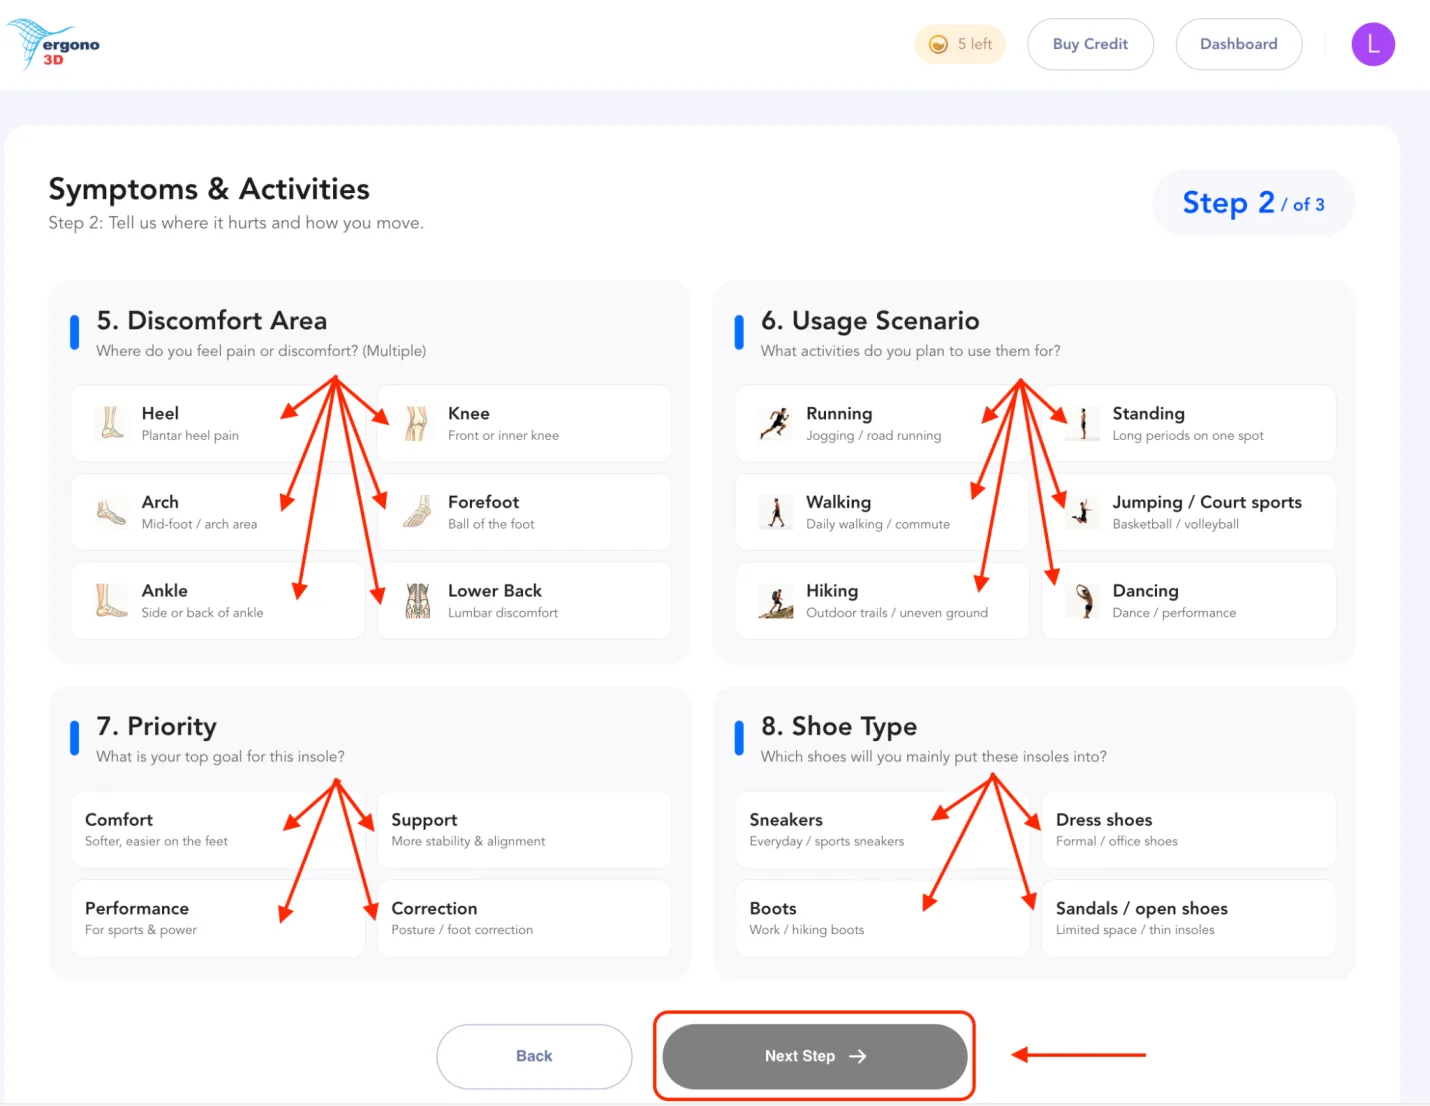
Multi-select your discomfort areas (heel / knee / arch / forefoot / ankle / lower back). Set the priority for this pair (comfort / support / performance / correction). Pick the usage scenarios you'll wear them for (running / standing / walking / court sports / hiking / dancing) and the shoe type you'll put them into (sneakers / dress shoes / boots / open shoes). Click Next.
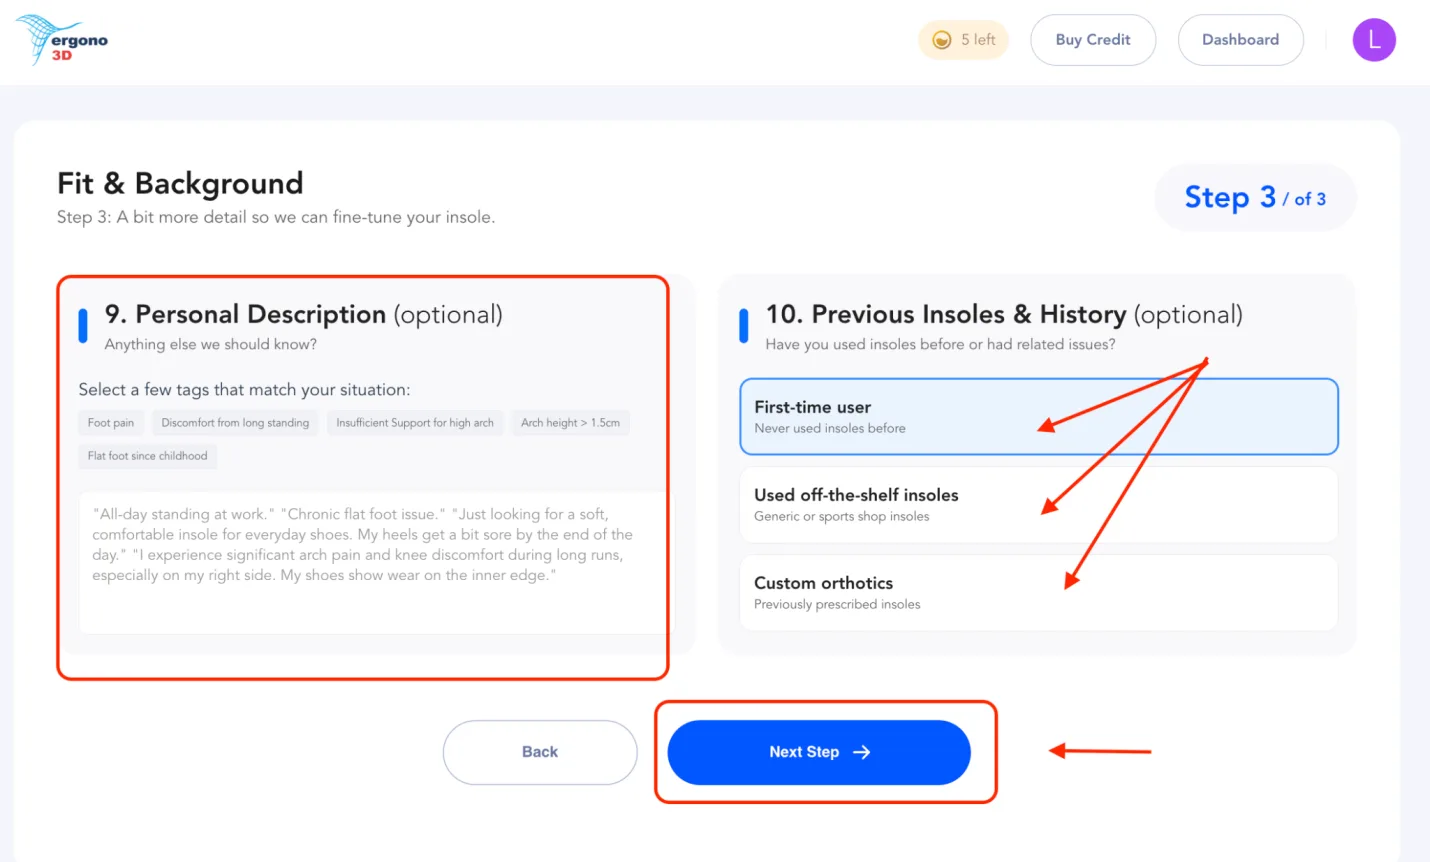
Optionally add a personal description — anything we should know that the earlier questions didn't cover. Then tell us about your insole history: first-time user, used off-the-shelf insoles, or used custom orthotics before. Click Next.
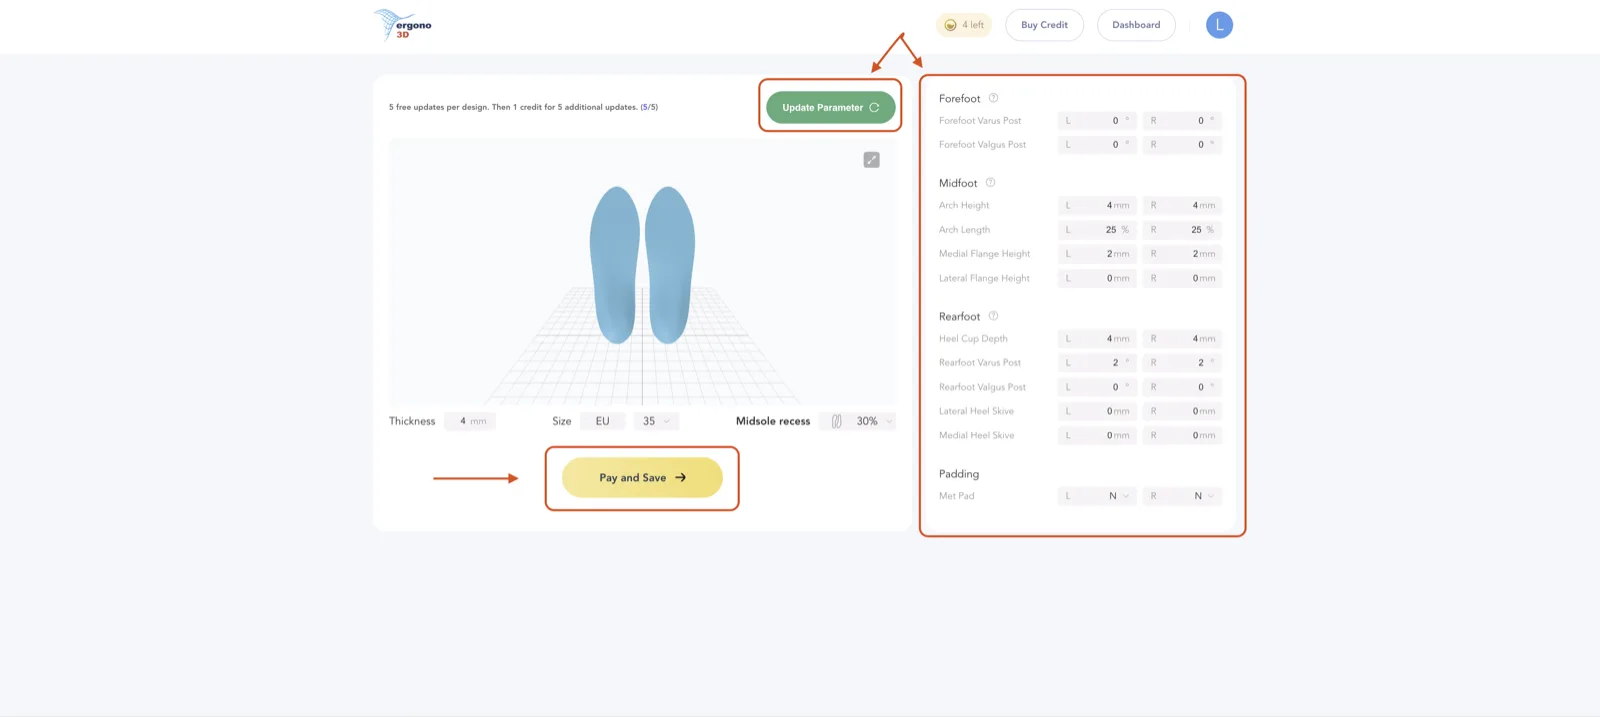
Your 100% personalised insole STL is ready. On this screen you can:
- Download & save the STL (bottom-left of the screen) — pay with your remaining credits, then save the file to your computer.
- Tweak advanced parameters in the right panel — fine control over forefoot posting, arch geometry, heel cup, skives, and metatarsal pad. Full list below.
- Update parameters — after any tweak, click Update parameters to regenerate. You can also change overall thickness, midsole recess, and re-select size on this same screen.
After you save & pay, the file lands in your dashboard. You're not locked in — every saved insole stays editable, so you can keep iterating any time from the Operate column.
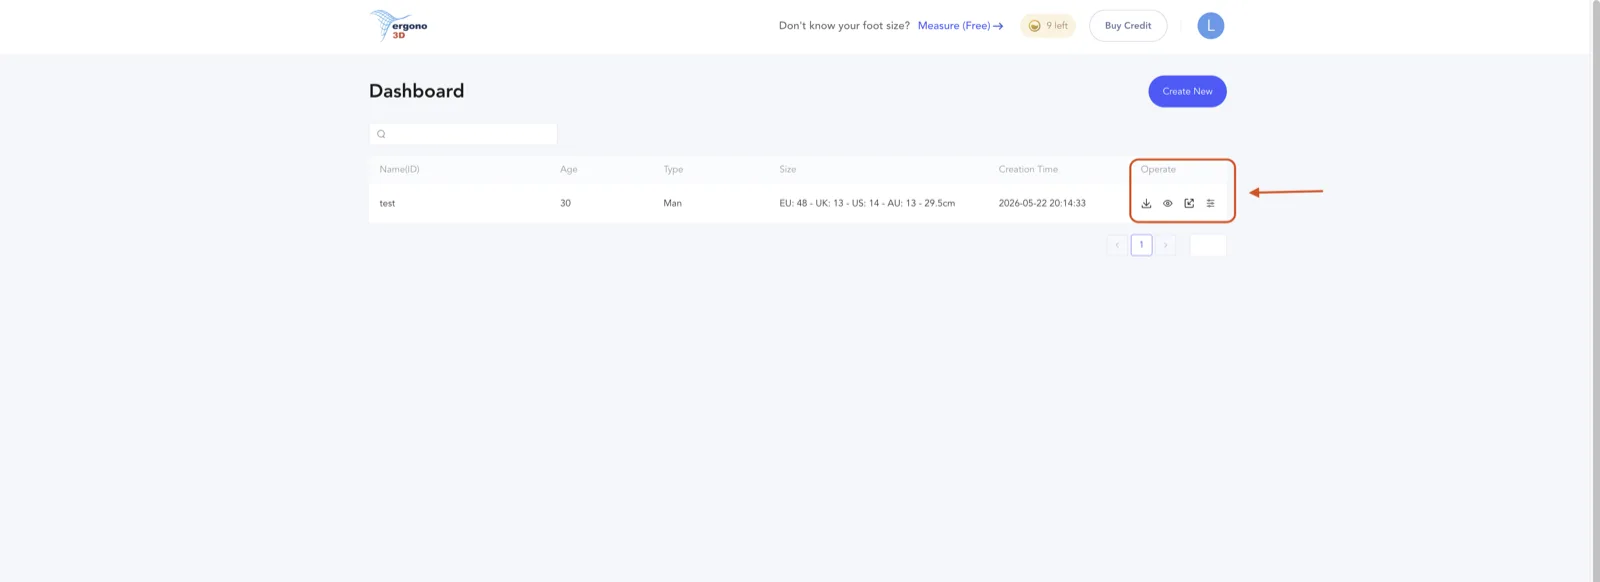
Four icons in the Operate column, left to right:
- Download STL — save the printable file to your computer.
- Online 3D preview — inspect the insole in your browser before printing.
- Scaling adjustment — opens the scaling panel (see below).
- Edit parameters — re-opens the full advanced parameter panel for fine-tuning. The editable fields are exactly the same list shown above.
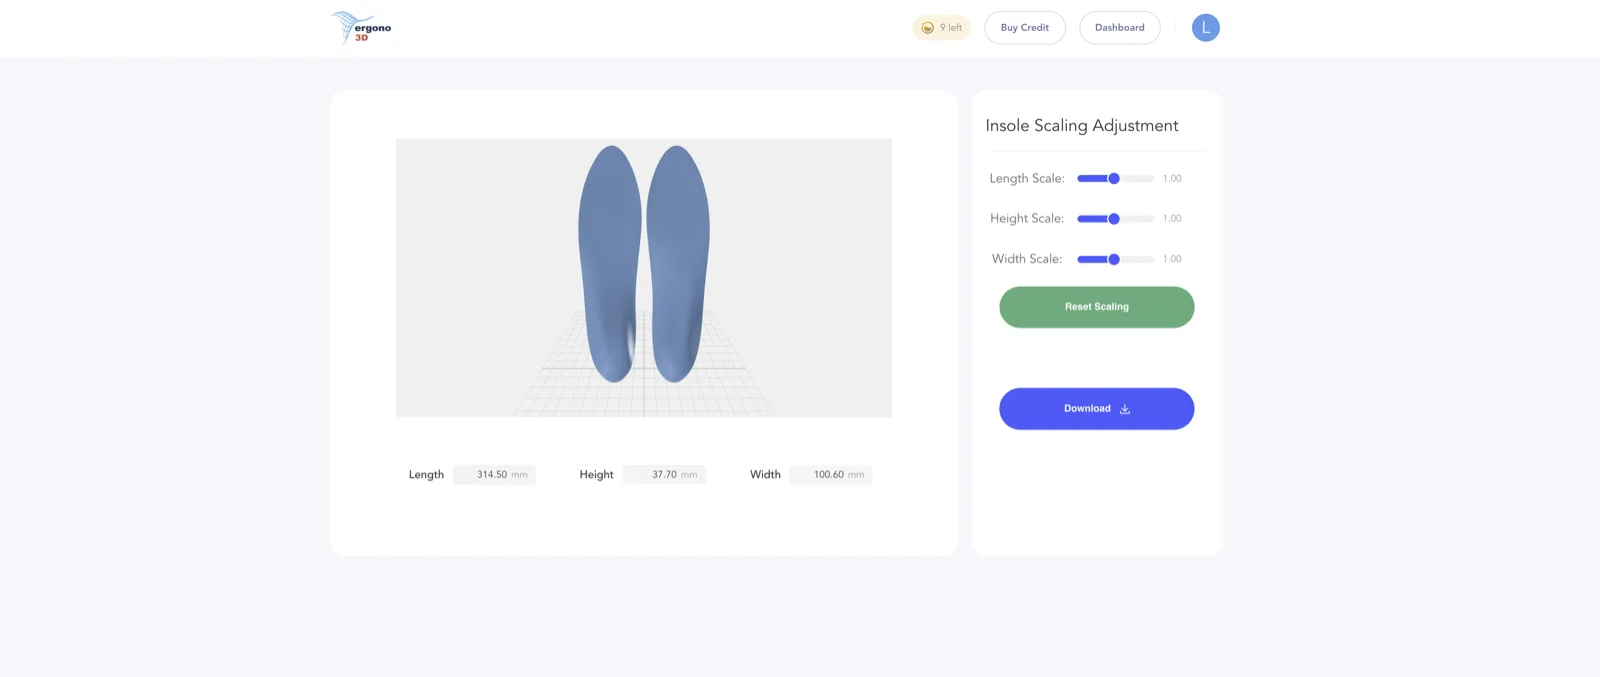
The Insole Scaling Adjustment page lets you fine-tune the overall dimensions with three sliders — Length Scale, Width Scale, and Height Scale. The 3D preview updates in real time, and you can download the rescaled STL directly from this screen.
Once the file is downloaded and you're happy with it, move to the next step.
Configure your slicer settings.
After importing the STL into your slicer, use this beginner-friendly, reliable baseline profile for TPU 95A:
| Setting | Recommended value |
|---|---|
| nozzle_temp | 235°C (range: 220–250°C) |
| bed_temp | 55°C (range: 45–60°C) |
| max_volumetric_speed | 3.2 mm³/s |
| print_speed | 25–50 mm/s |
| infill_pattern | Gyroid |
| infill_density | 20% |
| retraction | 0 mm (OFF) |
| cooling_fan | 100% max |
For TPU 85A and 90A settings, see the full print settings table on the Pricing page → — or read the deeper TPU material guide.
Click print.
Two things to watch during the print:
- Make sure the first layer sticks to the build plate. If it doesn't, stop and restart — a failed first layer means a failed print.
- If you see severe warping mid-print, stop immediately. Continuing will almost certainly ruin the part.
In most cases, a pair of insoles will finish after a few hours depending on printer speed and infill density.
Finishing after the print.
- Remove the insoles and trim off the brim (if any) with scissors.
- Use small scissors or sandpaper to gently round the edges — especially around the heel where sharp edges can rub.
- Add a top cover layer — EVA foam, Poron, or fabric — for comfort, sweat management, and friction control.
Choosing a top cover by activity: Poron for impact absorption (running, basketball, court sports); EVA foam for all-day comfort (standing all day, walking, office wear); perforated leather or fabric for dress shoes (low bulk, breathable). If your feet are sensitive (e.g. flat feet, plantar fasciitis-style pressure), you may find thicker Poron more comfortable than thin fabric.
Wear test feedback. Optional, but highly recommended.
If you want the next version to feel better, three notes are enough:
- Where it feels too high or rubs: forefoot / inner arch / outer arch / heel edge
- Support feel: too stiff / too soft / just right
- Where fatigue or hotspots appear first: heel soreness / arch fatigue / tight calves / knee discomfort / friction points inside the shoe
Feedback → next-iteration tweak. This table is the practical bridge between "how it felt" and "what to change before reprinting":
| What you feel | Zone | Next-iteration tweak |
|---|---|---|
| Heel hotspot or friction | Rearfoot | Reduce heel cup depth |
| Plantar fasciitis-style heel pain | Rearfoot | Increase heel cup depth · soften to TPU 85A |
| Arch fatigue after long standing | Midfoot | Increase arch height |
| Arch feels too high / sharp pressure | Midfoot | Reduce arch height |
| Forefoot burn during running | Forefoot | Met pad: Yes · raise top cover thickness |
| Insole sliding inside shoe | Global | Reduce overall thickness or midsole recess |
| Ankle rolls inward (overpronation) | Rearfoot | Add medial heel skive · add varus post |
| Knee or shin discomfort developing | Rearfoot | Check rearfoot post angle — may be too aggressive |
| Shell feels too stiff overall | Material | Next print: TPU 85A or 90A · lower infill density |
| Shell feels too soft / collapses | Material | Next print: TPU 95A · raise infill density |
Each parameter is explained in detail in the Insole Design Parameters guide →
Quick fixes. 90% of failures happen here.
- WARPING · LIFTING OFF BED Increase the brim. Raise bed temp slightly. Use a glue stick or painter's tape on the build plate.
- STRINGING TPU is moisture-sensitive. Temperature may be too high. Retraction may not be ideal. Dry the filament first — this solves the majority of stringing cases.
- BUBBLES · HOLES ON SURFACE Filament is wet. Dry it first (65°C in a food dehydrator or oven for 4–6 hours).
- WEAK LAYER BONDING Printing too fast, nozzle temp too low, or cooling fan too high. Slow down, raise temp slightly, reduce fan.
- EDGES RUBBING FEET Round the edges manually. For the next version, choose a geometry with softer edge transitions.
- TOO STIFF Lower infill density. Reduce wall count by one. Choose a softer structure in the next generation.
- TOO SOFT Increase infill density. Add more walls. Choose a more supportive version in the next generation.
- ARCH FEELS TOO HIGH (PLANTAR FASCIITIS PATTERN) Reduce arch height in the next iteration. If your foot is sensitive to arch pressure, also try TPU 85A for a softer compression feel under the arch.
- HEEL SLIPPING INSIDE SHOE The insole is too thick for that shoe. Reduce overall thickness, or increase the midsole recess to lower the heel-sit. Confirm the brim is fully trimmed and edges are rounded.
Try Ergono3D to generate your own custom insole design with parametric control and STL export. Free preview — 5 credits, no card required.
Common questions about 3D printed insoles.
How long does it take to 3D print a pair of insoles?
Estimated time: a few hours per pair, depending on print speed and infill density. As a rough estimate from the slicer settings in this guide: slower settings (25 mm/s with 20% gyroid infill) extend toward 5–6 hours, faster settings (50 mm/s) bring it closer to 2.5–3 hours. Add design and slicing prep at the start, plus post-processing at the end — total turnaround is typically half a day from STL to wearable pair.
How much does it cost to print a pair of custom insoles?
Material cost is small — TPU filament typically sells in the $30–40/kg range from major suppliers, and a single pair uses only a small portion of a spool. Design starts with 5 free preview credits for new accounts (see the Pricing page for current rates if you need more). Add a top cover (a few dollars depending on material). The all-in cost is a small fraction of the $300–600 typical for traditional clinic-made custom orthotics.
What's the best TPU hardness for insoles — 85A, 90A, or 95A?
85A is softest — best for cushioning, long standing, and users with sensitive feet (plantar fasciitis-style heel pain often pairs well with 85A). 95A is firmer — best for stability under load, running, and overpronation control. 90A sits in the middle for general use. A common starting point is 95A — step down to 90A or 85A if the first print feels too rigid.
→ Deeper material analysis: TPU for Insoles guideAre 3D printed insoles good for plantar fasciitis, flat feet, or high arches?
These are exactly the foot types that benefit most from a personalised shell vs. a one-size foam insert. For plantar fasciitis-style heel pain, start with a deeper heel cup and moderate arch height. For flat feet, prioritise medial flange support and a longer arch length ratio. For high arches, match arch height closely and add forefoot padding to distribute load. Always check with a clinician if you have a confirmed medical diagnosis.
→ Foot biomechanics background: Why Custom Insoles Matter3D printed insoles vs custom orthotics — what's the difference?
Traditional custom orthotics are made from plaster casts or scans by a clinician, take 1–2 weeks, and cost around $300–600. 3D printed insoles via Ergono3D start from a parametric design (no casting), print in hours, and cost only a small fraction of that. The trade-off: traditional orthotics carry clinical authority and possible insurance coverage; 3D printed insoles offer faster iteration cycles and lower cost.
→ Full comparison: Beyond the Foam InsertDo I need a special 3D printer to make TPU insoles?
No — an entry-level FDM printer that reaches 220–250°C nozzle and 45–60°C bed is enough. Bambu, Prusa, Creality, Anycubic — all common consumer printers can print TPU. Direct-drive extruders handle TPU more reliably than Bowden setups (less filament buckling). A heated bed is required; an enclosure is not. One upgrade worth considering: a nozzle designed for flexible filaments — wear-resistant or smoother-bore nozzles built for TPU handle the material more reliably than the stock brass nozzle that ships with most entry-level printers.
How long do 3D printed TPU insoles last?
Lifespan depends on body weight, activity intensity, frequency of use, and TPU hardness — but for typical daily-life wear at non-athletic intensity, around 18 months is a reasonable expectation. Heavy athletic use or higher body weight shortens this; lighter wear extends it. Many users print multiple pairs for different scenarios (a running pair, a work pair, a recovery pair) and rotate between them, which extends the life of each pair and also matches the insole to the activity. Crucially, your STL stays in your Ergono3D account: even a year later, you can re-download the same file for free, or iterate further on the same design. Reprinting only costs the TPU filament — making long-term replacement very low-cost.
Can I 3D print insoles for running, basketball, or other sports?
Yes — and activity-specific design is one of the biggest advantages of parametric insoles. Running needs forefoot cushioning and heel cup depth. Basketball and court sports need lateral stability (medial heel skive, rearfoot post) for cuts and landings. Hiking prioritises arch support over a longer day. Use the activity field in the Ergono3D survey and iterate based on wear feedback.
→ Activity-specific design: Why One Insole Design Doesn't Fit Every Activity